Apa Itu Network Booting (PXE) dan Bagaimana Cara Menggunakannya?

Pernahkah Anda perlu memecahkan masalah atau mendiagnosis komputer yang bermasalah dan Anda lupa di mana CD utilitasnya? Kami akan menunjukkan kepada Anda cara memanfaatkan booting jaringan (PXE) dengan FOG untuk menjadikan masalah itu di masa lalu.
Gambar oleh h.koppdelaney
Tinjauan PXE
PXE (Pre eXecution Environment), Pixie yang diucapkan dengan penuh kasih (seperti dalam fairy dust), adalah metode agar komputer akhir (klien) boot hanya dengan menggunakan kartu jaringannya. Metode boot ini dibuat pada tahun 1999 dan selama komputer yang bersangkutan terhubung ke jaringan (dan mendukung standar ini), dimungkinkan untuk menghindari prosedur boot normal (IE Power on -> BIOS -> HD / CD) dan melakukan beberapa hal bagus mulai dari pemecahan masalah, hingga menggunakan liveOS dan bahkan pencitraan ulang mesin…. tapi kita maju dari diri kita sendiri mari kita kembali ke awal.
Saat menggunakan PXE, proses booting diubah dari urutan normal menjadi:
Nyalakan -> BIOS -> Tumpukan PXE Kartu Jaringan -> Program Boot Jaringan (NBP) diunduh menggunakan TFTP dari server ke RAM Klien -> Tanggung jawab NBP untuk melakukan langkah berikutnya (alias boot tahap ke-2).
Dengan menggunakan NBP "PXElinux", dimungkinkan untuk mengatur server untuk lebih dari satu program boot PXE untuk klien kami. Dalam arti tertentu, itu adalah bahan rahasia yang memungkinkan kita melakukan semua hal di atas dan kemudian beberapa. Untuk penjelasan yang lebih mendalam tentang keseluruhan proses, sejarahnya dan beberapa opsi infrastruktur yang diaktifkannya dan gPXE (yang merupakan sepupu yang lebih berkembang), lihat kuliah ini di YouTube dari pengembang mereka. Juga, di bawah ini adalah video setup dari tahun 2008 yang dengan cepat membahas beberapa kemungkinan booting.
Tujuan
Panduan ini akan menjadi yang pertama dari serangkaian panduan tentang PXEing. Dalam panduan ini, kami akan meletakkan dasar yang akan kami bangun di artikel mendatang.
Rekomendasi, Asumsi dan Prasyarat
- Mesin klien yang Anda uji, mendukung booting PXE dan Anda tahu cara mengaktifkannya.
- Panduan ini ditulis dan diuji menggunakan Debian Squeeze, Ubuntu server 9.10 dan Linux Mint10. Oleh karena itu diasumsikan bahwa Anda memiliki sistem berbasis Debian untuk bekerja juga.
- Anda mungkin ingin melihat Cara Mengatur RAID Perangkat Lunak untuk Server File Sederhana dan Cara Mengatur agregasi Tautan Jaringan (802.3ad), karena permintaan bandwidth jaringan dan disk pada server semacam ini dapat menjadi sangat tinggi dengan sangat cepat. Sangat disarankan untuk membangun di atas fondasi server dengan ketahanan tinggi untuk jaringan dan subsistem disknya.
- Anda akan melihat saya menggunakan VIM sebagai program editor, ini hanya karena saya sudah terbiasa… Anda dapat menggunakan editor lain yang Anda suka.
Instalasi - Pengangkatan berat dengan memanfaatkan FOG
FOG adalah solusi kloning komputer open source gratis yang dibuat oleh * Chuck Syperski dan Jian Zhang. FOG mengambil perangkat lunak yang tersedia secara teratur (seperti Apache, MySQL, dan tftpd-hpa untuk menyebutkan beberapa) dan mengemasnya ke dalam solusi PC Lifecycle Management (PCLM) gratis dan diproduksi. Menggunakan PCLM gratis ini dimungkinkan untuk mencadangkan status komputer dengan mencitrakannya, menerapkan program dan pengaturan (IE Firefox, Office, Printer & etc ') dan kebijakan konfigurasi (IE otomatis logoff dan pengaturan screen saver) untuk menyebutkan beberapa, melalui satu antarmuka web pusat.
Catatan : Wawancara dengan Chuck dan Jian tentang FOG tersedia di Tightwad Tech.
Menggunakan FOG sebagai fondasi untuk server PXE Anda, adalah jalan pintas yang bagus untuk memiliki semua bagian yang diperlukan seperti TFTP dan jika diperlukan, DHCP di tempat tanpa harus menginstal dan mengkonfigurasinya secara manual, sambil memberi Anda semua fungsionalitas FOG sebagai bonus .
Karena tujuan kami adalah menambahkan fungsionalitas ke sistem yang sudah hebat ini, kami tidak akan membahas cara menggunakan FOG itu sendiri, maupun prosedur instalasinya secara mendalam. Wiki FOG, dengan petunjuk tertulis & video mereka cukup kuat untuk mendapatkan informasi yang mendalam, jika Anda ingin mengetahuinya. Langkah-langkah yang dirangkum adalah:
sudo mkdir -p /opt/fog-setupDownload the latest FOG packagefrom sourceforge to the directory created in the previous step.Extract the package and start the installation.sudo tar -xvzf fog*You will be prompted several times by the installer:
3. What is the IP address to be used by this FOG Server? [server-IP-detected-on-eth0] – Enter.
10. Acknowledge and follow the on screen instructions for “MySQL“.
11. Leave the MySQL password blank for the root account.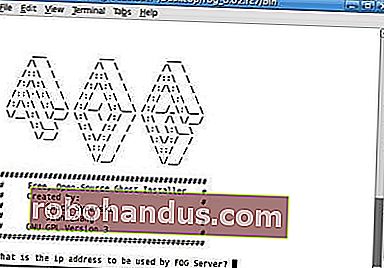
Image from the FOG wiki.Go to the Fog address with your browser and follow the on screen instructions.

*Note: Assuming you do NOT have another DHCP or that it is not setup to handle PXE. If you want to configure your existing DHCP, see Configure DHCP for PXE.
As far as installing FOG goes, that should be it. Again, while FOG is a great system, using it, is not the focus of this guide, and we encourage you to head over to it’s wiki so you can get a better grasp of FOG’s abilities and how it can help you to manage your clients lifecycle.
If all when well you should be able to PXE boot your client machine (usually F12) and get greeted by FOG’s default menu.

As a quick “taste of things to come” you may select the “Run Memtest86+” option and get greeted by the Memtest program we covered in our “Diagnose PC Hardware Problems with an Ubuntu Live CD” guide.
File and directory Structures
As stated earlier, our aim is to extend FOG’s abilities and to that end we will need to add some files and directories.
Create the subdirectory structure:
sudo mkdir -p /tftpboot/howtogeek/menus
These sub-directories will serve as templates for all the pictures, programs and configurations we will use to extend FOG.
Adjusting the “default” configuration file
We will build a new main menu, and put all of the FOG functions into their own sub-menu.
Copy the /tftpboot/pxelinux.cfg/default configuration file into howtogeek/menus/fog.cfg
sudo cp /tftpboot/pxelinux.cfg/default /tftpboot/howtogeek/menus/fog.cfg
Now edit the content of the original “default” file:
sudo vim /tftpboot/pxelinux.cfg/default
Make its content look like this:
DEFAULT vesamenu.c32
LABEL FOG
KERNEL vesamenu.c32
APPEND howtogeek/menus/fog.cfg
LABEL Utils MENU
LABEL Linux
LABEL fog.local
When we finish, this configuration will give you 3 sub-menus: “Utilities”, “Manual FOGing”, “Linux stuff”.
Create the “master” file
The master file allows us to make global changes to the look and feel of the menus without reentering them individually over and over. Things like the default background picture, border stile, position Etc’, will all be consolidated in this master.cfg file.
Create the file:
sudo vim /tftpboot/pxelinux.cfg/master.cfg
Make it’s content look like:
MENU BACKGROUND fog/genie.png
MENU MARGIN 0
The configuration above, will create the purple borders and highlighting, if you whish to have a different look and feel, simply change the values.
To set a background picture, put a picture in the “/tftproot” directory and point the “MENU BACKGROUND” to the picture’s relative path (we recommend using pictures with resolution of 640*480). For example the full path for the above configured picture would be: “/tftproot/fog/bg.png“.
Connect the FOG sub-menu to the main menu
Because we made a simple copy of the original configuration file into the menus sub-directory (keeping its color schema, timeouts and alike), if you go into this sub-menu now from the PXE booted client, it would work, but you will not be able to return to the main menu without rebooting the machine.
So edit the /tftpboot/howtogeek/menus/fog.cfg file:
sudo vim /tftpboot/howtogeek/menus/fog.cfg
Add this entry after the “menu color title” entry and before the FOG functions:
LABEL back
Create the sub menu skeletons
We have created 4 sub-menus, three of them are up to us to fill. To do so, lets create the template that we will be building on.
Create the template file:
sudo vim /tftpboot/howtogeek/menus/template.cfg
Make this its content:
MENU INCLUDE /pxelinux.cfg/master.cfg
Lets set the stage for additional sub-menus, which will be covered in future guides:
cd /tftpboot/howtogeek/menus/
That’s it, the basic layout is now ready and from now on, we only need to build upon it, which we will in future guides. Until these future guides arrive, you are encouraged to get familiar with FOG as it is an exciting ride upon it’s self.
Update: The future is here :)
How To Network Boot (PXE) The Ubuntu LiveCD
Go FOG yourself 
Original text